




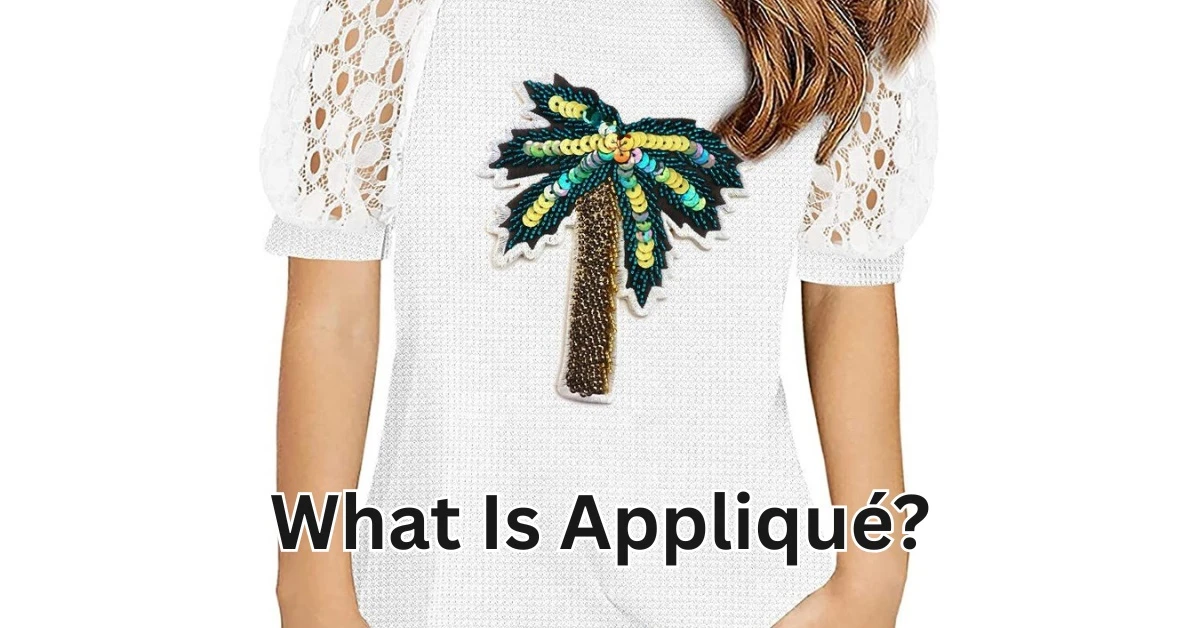
Appliqué refers to a craft. You place a smaller fabric piece atop a larger base. Then you attach it by stitch, heat, or adhesive. The result shows clear shapes, patterns, or motifs. People use appliqué in quilts, apparel, bags, and home decor. It adds color, texture, and a design layer that cut-and-sew alone cannot match.
Appliqué goes back centuries. Cultures in Asia, Africa, and Europe used it for garment trim and ritual cloth. Quilters in the U.S. adopted it widely by the 1800s. Today, artisans blend tradition with modern tools.
Where do you see appliqué today?
- Quilts: signature blocks and focal images.
- Fashion: logos, patches, brand details.
- Home decor: pillows, wall art, table runners.
- Accessories: backpacks, patches, textile jewelry.
Table Of Contents
Four Main Types of Appliqué
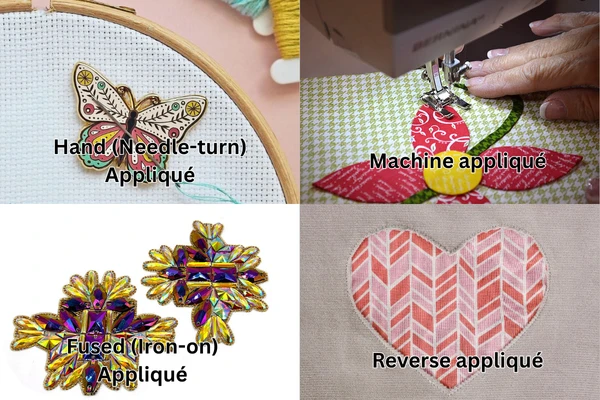
Hand (needle-turn) appliqué
A classic choice. Cut a shape. Place on the base. Fold the edge under. Sew by hand with tiny blind stitches. Result: a soft, refined edge. Time: moderate. Skill: medium.
Machine appliqué
Fast and versatile. Use a straight stitch, zigzag, or satin stitch. Use a presser foot that guides small pieces. Result: durable edge. Time: low to medium. Skill: beginner to advanced, depending on the stitch.
Fused (iron-on) appliqué
Use fusible web or adhesive film. Press the shape onto the base. Finish the edge by stitching or leave it raw. Result: instant hold. Time: very low. Skill: easy. Best for craft projects and quick patches.
Reverse appliqué
Cut through the base fabric. Layer fabrics beneath. Reveal shapes by cutting away the top layers. Result: sculpted, inset look. Time: higher. Skill: medium to advanced.
Six Common Techniques (step-by-step highlights)
Raw-edge appliqué
- Cut shape.
- Place on base.
- Secure with glue or stitch near the center.
- Machine sew close to the edge with zigzag or satin stitch.
Raw-edge offers fray and texture. It suits casual looks.
Turned-edge appliqué
- Cut shape with allowance.
- Turn the edge under either by hand or with an edge-turner tool.
- Sew by hand or machine close to the folded edge.
This yields clean lines. It suits fine garments.
Satin-stitch appliqué
- Use a narrow, dense zigzag.
- Cover the raw edge completely.
- Adjust stitch width and length to match fabric.
Satin-stitch gives polished, bold edges. It absorbs 2–3× thread compared to a straight stitch.
Blanket-stitch appliqué
- Use a decorative stitch on the machine or by hand.
- Set spacing so stitches sit on the edge.
This technique adds a craft look. It gives texture and durability.
Embroidery appliqué
- Hoop fabric and stabilizer.
- Let the embroidery machine sew the outline.
- Trim away excess fabric.
This gives precise motifs. Use for logos and repeat motifs.
Bead and sequin appliqué
- Attach beads or sequins to the applique piece before or after attachment.
- Reinforce with an extra stitch.
This adds luxury and sparkle. Expect higher care needs.
Tools, Materials, and Prep (3 essentials + extras)
Stabilizer and interfacing
Pick a stabilizer based on fabric weight. Use a light fusible for knits and a mid-weight for a woven base. Stabilizer prevents puckers. Number rule: 1–2 layers for thin fabric, 2–4 layers for heavy fabric.
Needles, threads, and feet
- Needle sizes: 70–90 for general work.
- Thread: polyester for strength; cotton for matte finish.
- Presser feet: applique foot, embroidery foot, or open-toe foot.
Templates, scissors, and heat tools
- Sharp scissors for clip cuts.
- Rotary cutter for curves.
- Iron and pressing mat for fused work.
- Edge-turner tool for tiny curves.
Design Tips and Troubleshooting
Scale and proportion
Small motifs need dense stitch or turned edges. Large motifs require fewer seams. Rule of thumb: motifs should cover 5–40% of the project area for balance.
Edge control
If you see puckers, add stabilizer. If raw edges fray too much, choose a dense stitch or turn the edge. If shapes shift, baste them first.
Fabric choice
- Stable woven for crisp shapes.
- Knit needs stretch control and fusible stabilizer.
- Sheer fabric requires gentle handling and a fine needle.
Quick Project Ideas and Time Estimates
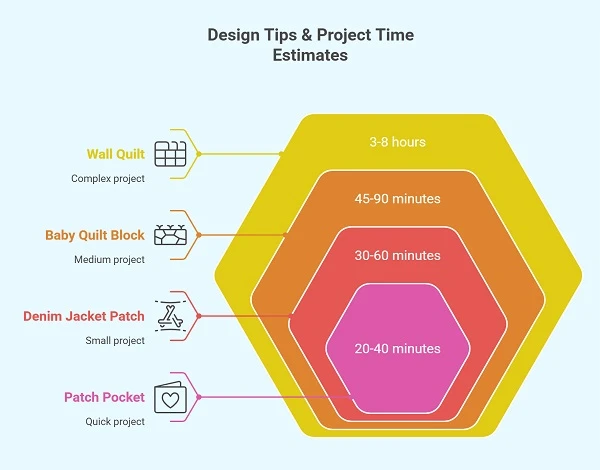
- Patch pocket with appliqué heart — 20–40 minutes.
- Baby quilt block with a fused animal — 45–90 minutes.
- Denim jacket patch with satin-stitch — 30–60 minutes per patch.
- Wall quilt with reverse appliqué — 3–8 hours depending on complexity.
Conclusion
Appliqué offers a large design range. You can add detail, brand identity, or art. Choose a type based on time, skill, and fabric. Handwork gives softness. Machine work gives speed. Fuse for quick results. Reverse work gives dramatic depth. Pick a project. Try one technique. Repeat and refine. You will learn fast. I still fumble with tiny curves. You will laugh, and then the piece will look great.
FAQs
1: What is the best fusible for knit fabric?
Use a lightweight fusible interfacing designed for stretch fabrics. Add one layer of stabilizer under the motif.
2: Can I appliqué over seams?
Yes. Use an extra stabilizer and sew slowly. Match stitch type to seam thickness.
3: Which stitch holds best for high-wear items?
Dense satin-stitch or small zigzag. Add topstitch and backstitch at ends for strength.
4: How do I stop fray with raw-edge appliqué?
Use a tight satin-stitch or apply a small amount of fray-block product to the cut edge.
5: Is reverse appliqué hard for beginners?
The technique needs care with cutting. Start with large shapes and stable fabric. Expect one or two practice pieces before a final project.


Comments - 00
Leave A Reply
Thanks for choosing to leave a comment.